
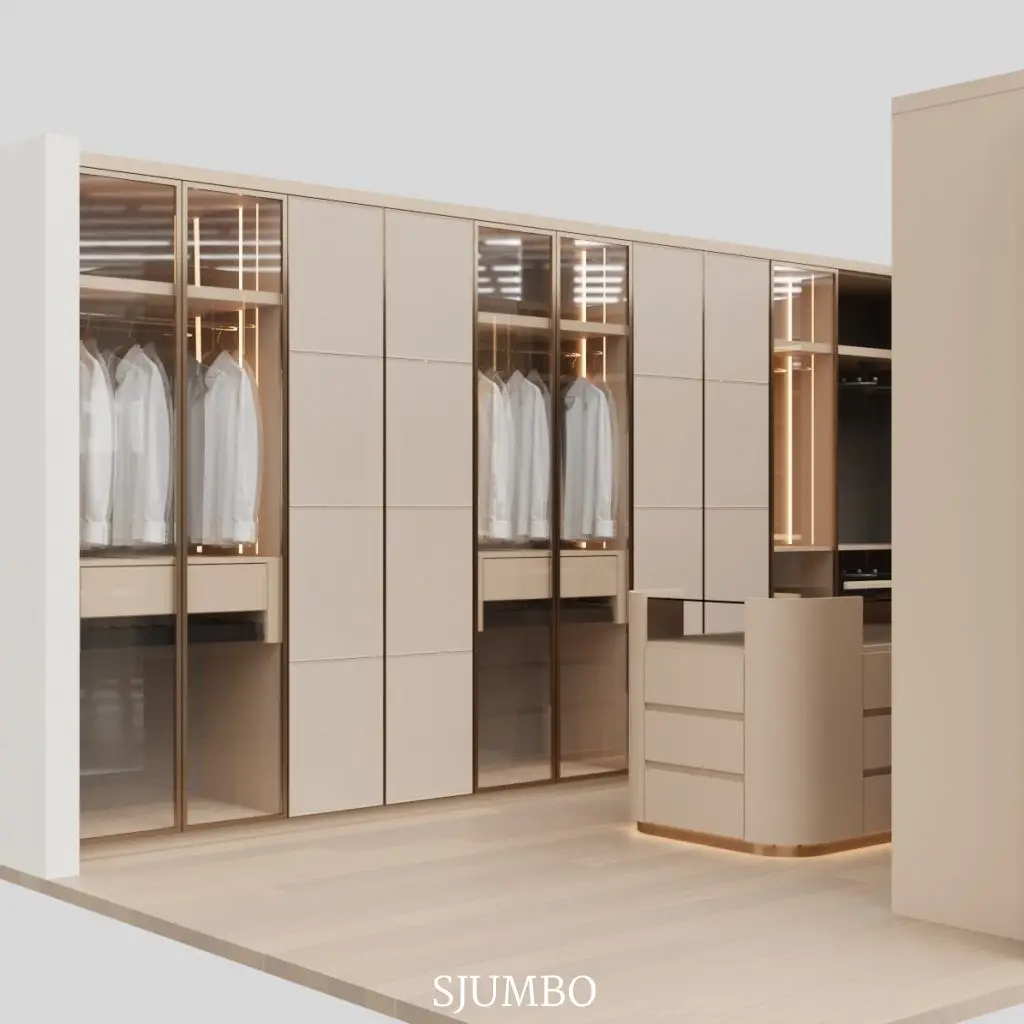
In the delivery of full-home custom projects, floor-to-ceiling wardrobes are the centerpiece that defines a sleek, luxury minimalist aesthetic. Yet many high-end projects face frequent after-sales issues such as top-edge rubbing and door jamming six to twelve months after handover. These problems not only drive up rework and after-sales costs for fit-out companies, but also directly damage owner satisfaction with premium residential projects. This article breaks down the hidden causes of drywall ceiling sagging from a structural assembly and cabinet detailing perspective, and provides a full-process engineering guide for anti-jam craftsmanship.
When working on design detailing, many designers focus most of their attention on facade proportions and internal storage layouts, and rarely cross-check the ceiling keel layout or structural load characteristics above the unit. This creates hidden risks for settlement issues later on. The truth is, even ceilings that fully meet construction acceptance standards experience natural minor deformation — a perfectly settlement-free ceiling practically does not exist in real project scenarios.
Drywall is a porous building material that expands and contracts repeatedly with seasonal humidity fluctuations, causing irreversible plastic deformation over the years. Combined with light steel or wooden keel structures, it also undergoes slow creep under the long-term stress of its own weight and additional ceiling loads. For full-wall floor-to-ceiling units, the central area of the corresponding ceiling lacks vertical support points, so sagging is far more noticeable than at the corners.
Occupancy of upper-floor units, added ceiling equipment loads, and even extended periods of rainy weather can all accelerate this process. By the time on-site teams report door rubbing, ceiling settlement has usually stabilized, and minor hinge tweaks alone cannot fix the root problem.
Settlement tolerances vary widely for ceilings of different structures and spans. The standard 3–5mm gap reserved during conventional installation is far from sufficient for large-span scenarios, which is the core reason why after-sales issues cluster six months after delivery in many projects.
| Single Ceiling Span | Light Steel Keel Allowable Deflection | Wooden Keel Allowable Deflection | Standard Installation Gap | Jamming Risk Level |
|---|---|---|---|---|
| ≤1.2m | 2–3mm | 3–4mm | 3–5mm | Low |
| 1.2m–2.4m | 5–8mm | 6–9mm | 3–5mm | Medium-High |
| ≥2.4m | 8–12mm | 10–15mm | 3–5mm | Very High |
To fundamentally eliminate jamming risks and reduce after-sales waste during project turnover, remedial action after the fact is not enough. Settlement allowance must be built into craftsmanship details at the design stage. Currently, there are three proven wardrobe anti-jam techniques verified across a large number of projects, adapted to different project positioning and scenario requirements.
This is the most widely applied method in high-end residential projects, balancing visual integrity and practical performance. A 10–15mm recessed architectural groove is created along the outer top edge of the wardrobe, paired with black or color-matched matte aluminum trim. The settlement space is fully concealed within the visual shadow. The actual door height does not reach the ceiling underside, yet from a front eye-level view, it still delivers a seamless full-height appearance.
This method offers an added advantage: it masks inherent unevenness in the ceiling. Many rough-in ceilings have horizontal deviations, and the shadow transition of the detail groove softens visual misalignment without the extra cost of full-area ceiling leveling. In most cases, this solution is ideal for single luxury residences and small boutique projects pursuing an ultra-minimalist finish.
For bulk fit-out projects with large spans and high settlement risk, the split top filler structure offers a far higher fault tolerance. A fixed filler panel matching the door’s color and material is first installed at the top of the cabinet body. The doors do not extend all the way to the ceiling underside; they only cover the lower portion of the filler panel.
When ceiling sag occurs over time, only the fixed upper filler panel takes the pressure, and it never interferes with the swing radius of the doors below. Door operation remains completely unaffected. You might worry that the joint would break the seamless look, but with matching materials and edge banding, the seam is barely visible from the front, preserving the cohesive floor-to-ceiling visual effect. This structure has greater tolerance room — even if settlement exceeds expectations later, only the filler panel needs adjustment, no full door disassembly required, which greatly reduces after-sales maintenance costs for bulk projects.
For wardrobes that are already installed and develop sagging issues later, there is a mature retrofit solution available. 3D adjustable hinges with a wide vertical adjustment range can fine-tune door position within a small range. At the same time, sufficient leveling space is reserved at the wardrobe base. When sagging occurs, the entire cabinet can be lowered by adjusting the support feet at the bottom to quickly resolve top-edge rubbing.
This solution requires no disassembly of doors or cabinet panels, and a single technician can complete adjustment for one cabinet unit in half a day, significantly shortening after-sales response time for delivered projects. Note that bottom leveling adjustment should not exceed 20mm, as this would compromise the overall stability of the cabinet.
Compared to after-the-fact fixes, early intervention during the ceiling construction phase minimizes settlement risks and reduces delivery disputes later on. When coordinating with construction teams on projects, we typically put forward these core requirements:
At project handover, it is not enough to simply verify that doors open and close normally. The top safety gap must be checked against door height to reserve sufficient space for long-term settlement.
| Total Door Height | Minimum Safe Top Gap at Delivery | Recommended Inspection Method |
|---|---|---|
| ≤2.4m | 5mm | Feeler gauge measurement |
| 2.4m–2.7m | 8mm | Feeler gauge measurement |
| ≥2.7m | 10–12mm | Feeler gauge + 30 consecutive swing tests |
During acceptance, doors should be opened and closed repeatedly to confirm the top edge never rubs against the ceiling through the full swing range. Initial gap data should also be recorded for settlement comparison during later maintenance.
In terms of short-term physical properties, light steel keels do have better overall rigidity than wooden keels. But from the perspective of long-term creep and engineering loads, large-span light steel keels without intermediate hanger support can see just as much sag in the central area as properly kiln-dried wooden keels. The key to reliable project delivery is strict enforcement of keel spacing controls and double-layer liner reinforcement, not reliance on material alone.
Not at all. Small, single-section wardrobes correspond to small ceiling spans with minimal sagging, so they rarely disrupt normal use. The wider the full-wall floor-to-ceiling wardrobe, the larger the corresponding ceiling span, and the higher the probability of issues. In addition, settlement deformation is slightly more pronounced in humid areas than in dry regions.
Well-executed craftsmanship hides all gaps within structural shadows or panel joints. No obvious gap is visible from a straight front eye-level view — you would only notice it if you lean in and look up closely. It does not disrupt the clean minimalist aesthetic at all. On the contrary, leaving no gap at all leads to far worse cosmetic damage later on, from chipped top edges to scratched ceiling paint from forced opening of jammed doors.
Absolutely not. Forcing the door open can chip the door edge banding, scratch ceiling paint, and in severe cases, cause hinge loosening or deformation. Arrange for a technician to survey the settlement amount on site first, then choose the appropriate solution based on actual conditions, such as leveling, edge trimming, or structural adjustment.
As a leading one-stop full-home custom solution provider in the industry, SJUMBO understands that every detail matters in project delivery. At the early stage of project detailing, our professional technical team will conduct on-site reviews, holding technical consultations on ceiling structure, keel layout and on-site humidity conditions to develop customized anti-settlement construction details for each project.
If you are a fit-out company manager, project manager, or high-end custom designer, welcome to contact our channel consultants. We will provide you with the SJUMBO Standard CAD Detail Set for Floor-to-Ceiling Wardrobe Nodes and full-project quotation support free of charge, to help you deliver every project flawlessly.
In residential and commercial interior projects, cabine […]
Choosing the right material for your home renovation in […]
Frequent shutdown of built-in refrigerators is caused b […]
In 2026, many practitioners who hold bathroom cabinet d […]
Related links:
About Us Company News Industry Updates Kitchen Cabinets Bathroom Suites Wardrobes Wall Systems Doors Windows & Balustrades SSL 100% Secure Transactions